Connecting your drone to WiFi is an essential step. This allows you to control it using your device and access various features. In this complete article, learn how to connect drone to WiFi.
First, turn on your drone and download the app needed to control it. Then, turn on WiFi on your phone or tablet, find the drone’s network, and select it. When a password is required, enter it from the drone’s manual. After connecting, check the app to confirm and start flying your drone.
This guide will discuss the process in simple steps. It will help you ensure your drone is ready for WiFi connection and offer tips for a smooth experience. Whether you’re a beginner or have some experience, it will be helpful and easy to follow.
Table of Contents
Key Takeaways
- Turn On The Drone And Remote: Turn on both the drone and its remote control to get them ready for the WiFi connection process.
- Access Drone Settings On Your Device: Go to the WiFi settings on your phone or tablet to find and select the drone’s network.
- Connect To The Drone’s Wi-Fi network: Choose the drone’s WiFi network on your device and type in the password if needed to connect.
Preparing Your Drone For WiFi
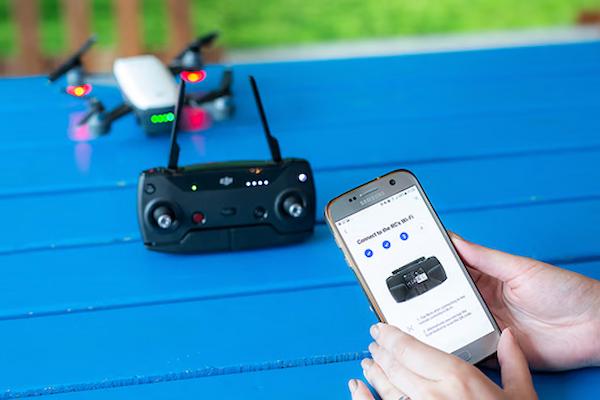
Preparing your drone for WiFi is an important step before flying. It ensures a smooth connection between your drone and your device. Key steps include charging the battery, turning on the drone, checking for updates, and finding the WiFi settings. These simple steps help you get ready for a successful flight.
Charge The Drone Battery
Charging the drone battery is important because a full battery helps your drone run without stopping. Always check how much battery is left before connecting the drone to WiFi. When the battery is low, the drone can turn off while setting up, which could cause problems. Make sure the battery is fully charged so everything works smoothly, and you can connect the drone to WiFi without any issues. A fully charged battery means no interruptions.
Turn On The Drone
After charging the battery, you must turn the drone on by pressing the power button. Look for lights or other indicators that show the drone is powered on. These signals help you know the drone is working properly and ready to connect to WiFi. When the lights are on, you can proceed with the next steps. This ensures the drone is fully prepared for you to control it using your device.
Ensure Firmware Is Updated
Firmware is the special software inside your drone that helps it work properly. It’s important to check if there are any new updates for the firmware. When an update is available, install it to ensure your drone runs smoothly and avoids glitches. Updated firmware helps your drone connect to WiFi without problems and ensures all features work correctly. Keeping the firmware updated means your drone stays in good shape for flying and connecting.
Locate WiFi Settings On Drone
Most drones have built-in WiFi settings that let you connect them to your phone or tablet. You can find these settings either on the drone or by using its app. Knowing where the WiFi settings are helps you get ready to connect the drone to your device. This step is important because it establishes the link between your drone and your controller. This makes it easier to fly and use all the cool features.
Step-By-Step Guide To Connecting Your Drone To WiFi
Connecting your drone to WiFi is easy when you follow the proper steps. This guide will help you set up your drone to control it using your phone or tablet. Following these simple steps will allow you to connect and fly your drone quickly and without any issues. Let’s get into the discussion.
Step 1: Download The Drone’s App
To control your drone, you need to download its unique app onto your smartphone or tablet. This app can be found in your device’s app store. The app helps you manage your drone’s settings and connect it to WiFi. Without the app, you won’t be able to control the drone or use many of its features. Make sure to download it before starting so you’re ready to connect the drone and begin flying.
Step 2: Enable Phone’s Wifi
To connect your drone, go to your phone or tablet’s settings and turn on the WiFi. This step is important because your drone sends out its WiFi signal, and your device needs to find it. Without enabling WiFi, your phone or tablet won’t be able to detect the drone’s network. Once WiFi is on, your device will be ready to connect to the drone. This allows you to control it through the app.
Step 3: Find Drone In Wifi List
After turning on WiFi on your phone or tablet, you’ll see a list of available networks. Your drone’s network will appear, usually showing the brand or model name of the drone. Scroll through the list to find the correct one. Once you spot it, tap on the network name to connect. This step is important to link your phone or tablet with the drone. This allows you to control it through the app and access all its features.
Step 4: Enter WiFi Password
Some drones need a password to connect to their WiFi network. When your device asks for a password, check your drone’s manual to find it. Enter the password carefully to make sure it’s correct. This step helps create a secure connection between your drone and your device, so no one else can connect to it. Once the password is entered, your device will be ready to control the drone through the app.
Step 5: Confirm Successful Connection
After entering the WiFi password, your phone or the drone’s app will let you know the connection was successful. Look for a message or symbol confirming the connection. Once connected, you can now control the drone using the app. This includes features like live video streaming and flying the drone. Checking for this confirmation ensures that everything is working properly, so you can start using your drone immediately without any problems.
Troubleshooting Connection Issues

Sometimes, you can have trouble connecting your drone to WiFi. This can happen for different reasons, but don’t worry! Troubleshooting connection issues involves simple steps like restarting your devices, checking the WiFi signal, or updating the drone’s firmware. These steps can help you fix the problem quickly.
Restart The Drone And Device
When you’re having trouble connecting your drone to WiFi, a quick solution is to restart both your drone and your phone or tablet. Turn off each device, wait a few seconds, and then turn them back on. This can refresh their systems and solve most connection problems by resetting the devices. After restarting, reconnect the drone to WiFi; it must work properly again. This simple step often clears up many common issues.
Move Closer To Router
When your drone isn’t connecting, the WiFi signal can be too weak because you’re too far from the source. Moving closer to the WiFi router or the drone can help strengthen the signal. This makes it easier for your device to detect and connect to the drone’s network. Being closer improves the connection speed and reduces interruptions. Stay within a reasonable range to maintain a strong connection while setting up your drone.
Reset The Wi-Fi Network
Resetting the drone’s WiFi network can help when you’re still having trouble connecting. Go to the drone’s WiFi settings, either in the app or directly on the drone, and restart the network. This can clear any problems that can be stopping the connection. The drone sends a fresh signal by resetting the WiFi, which can help your phone or tablet connect more easily. After resetting, try connecting again to see if the issue is resolved.
Update The Drone’s Firmware
When your drone’s firmware is outdated, connecting to WiFi can cause problems. Firmware is the software that helps your drone run smoothly. Always check for updates and install them when available to avoid connection issues. You can usually find updates in the drone’s app or settings. Keeping the firmware up-to-date ensures that your drone works properly. This also reduces the chances of connection problems and makes your flying experience better and more reliable.
Tips For Strong WiFi Signal
Getting a strong WiFi signal is important for flying your drone smoothly. Weak signals can cause your drone to lose connection or not respond well. By following simple tips, like flying in open areas and avoiding crowded WiFi zones, you can improve the signal and enjoy a better flying experience.
Fly In Open Areas
When flying your drone, WiFi signals can weaken if obstacles like buildings, trees, or walls block the signal. To avoid this, flying your drone in open areas with nothing in the way is best. This helps keep the signal strong and reduces the chance of losing connection. A clear space ensures the drone responds quickly to your commands. This makes your flying experience smoother and safer without interruptions.
Avoid Crowded WiFi Zones
In areas with many WiFi networks, like busy parks or cities, your drone’s signal can get mixed up or weak because of interference from other networks. This can make it harder for your drone to stay connected. To prevent this, try flying in areas where there aren’t too many WiFi networks. Fewer networks mean less interference, and your drone’s connection will be more robust and reliable. This gives you better control and a smoother flight.
Use WiFi Boosters
When flying your drone over long distances, the WiFi signal can weaken as you move farther away. To help with this, you can use a WiFi booster. A WiFi booster strengthens and extends the range of your signal, allowing your drone to stay connected even when it’s far from your device. This helps prevent losing control of the drone and ensures a smoother flying experience over greater distances. This makes it easier to fly without interruptions.
Keep Drone Within Range
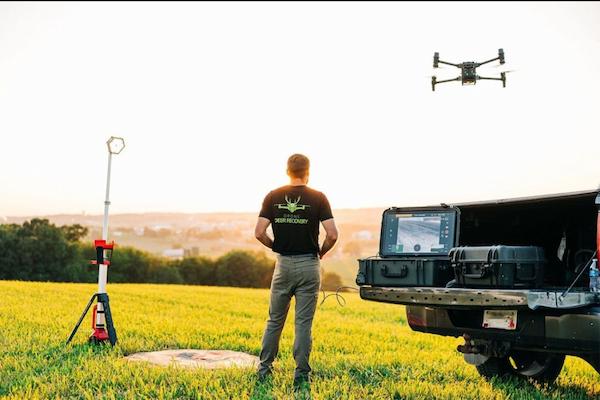
Every drone has a limit on how far it can stay connected to WiFi. To avoid losing control, always keep your drone within the recommended range. When you fly too far, the WiFi signal can weaken or disconnect, making it hard to control the drone. Staying within the range ensures a stable connection so you can fly safely and without interruptions. Always check the drone’s manual for the exact range limit before flying.
FAQs
1. Can I Connect My Drone To Wi-Fi Without A Mobile App?
No. In most cases, you can’t connect your drone to Wi-Fi without using its specific mobile app. The app helps you control the drone and manage its settings. Some advanced drones can offer basic controls through a remote, but you’ll need the app for full access to all features and functions.
2. How Do I Connect A Drone To Wi-Fi On iPhone?
To connect a drone to Wi-Fi on an iPhone, first, turn on your drone and download the drone’s app. Next, open the Wi-Fi settings on your iPhone and find your drone’s network. Select it, enter the password if required, and confirm the connection through the app. You’re now ready to fly!
3. Does My Drone’s Wi-Fi Work Indoors And Outdoors?
Yes. Your drone’s Wi-Fi works both indoors and outdoors. However, the signal can be stronger outdoors due to fewer obstacles like walls or furniture that can block Wi-Fi indoors. For the best connection, fly in open spaces to avoid losing signal, especially in crowded or enclosed areas.
Conclusion: How To Connect Drone To WiFi
Connecting your drone to WiFi is simple when you follow the right steps. Start preparing your drone, ensuring the battery is charged, and the firmware is updated. When connecting, check for any WiFi issues and fix them by restarting devices or moving closer to the WiFi source.
Keeping your drone within its recommended range, flying in open areas, and avoiding crowded WiFi zones will help you maintain a strong connection. Always remember that drones can have slightly different instructions, so reading your drone’s manual for specific details is essential.
Following these tips, you can connect your drone to WiFi smoothly and enjoy flying without problems.